DIY Lace Cat Mask
I've been excited about Halloween since early September when H and I booked our flights to New Orleans. We're going down the weekend before Halloween which is when they have their parade and party (because the actual weekend of the 31st they have their voodoo festival).
I've been debating about my costume for weeks. I wanted to do something kind of cool but low-maintenance (since I have to travel with it) and since I expect it to be 70F in NOLA, I wanted to have a light costume that wouldn't leave me sweating. Well, I found a "catsuit" (emphasis on the quotations) and decided that, though it's been done before, being a cat would be fun and classic and super low maintenance.
But, to amp it up a bit more, I decided to DIY some more elements to accompany the outfit. Instead of the typical cat ears, I got inspired by my own bib necklace (I still have tulle leftover from that project and from my woodland nymph bustier project) and I made an easy cat mask using just some fabric paint and some ribbon. I've seen a similar DIY done before but I always like sharing my own version because I list my personal tips and tricks that may help you.
 You'll need:
tracing paper
pencil
black marker
scissors
puffy paint (I used black but you can use whatever color you like; there are some pretty glittery ones that could be awesome)
strip of tulle, about 4" x 8"
parchment paper
ribbon
fabric glue
 Start by holding up a piece of tracing paper to your face and marking out the edges of your eyes. Cut out eye holes and then hold it up to your face and continue trimming until it feels comfortable.
 Then, cut out the general shape of a mask and do one last check to make sure the mask suits your face and you can see clearly.
 Take a second sheet of tracing paper and fold it in half. Fold the eye measurement parchment in half and trace it onto the clean parchment using a pencil and then start designing the mask.
 Get as elaborate as you like. I went a little overboard; the design shouldn't be too complex because it's hard to be super precise with the puffy paint.
 Once you've got your pencil outline, trace it with a marker to darken it.

 Flip the tracing paper over and then trace the second half of the mask. And this is why the tracing paper is so important. It makes it super easy to draw a perfectly symmetrical mask.

 Lay a piece of parchment paper over your design and then lay the tulle on top. Then, start piping the puffy paint on top of the tulle. Then, let it dry for at least 24 hours. If your puffy paint lines are v. thick, you might need to let it dry for longer.

 Gently peel the mask away from the parchment and then glue pieces of ribbon on either side of the mask right onto the tulle. Let the glue dry for another couple of hours.
 When the glue is dry, cut away the excess tulle around the edges and in the eye holes.
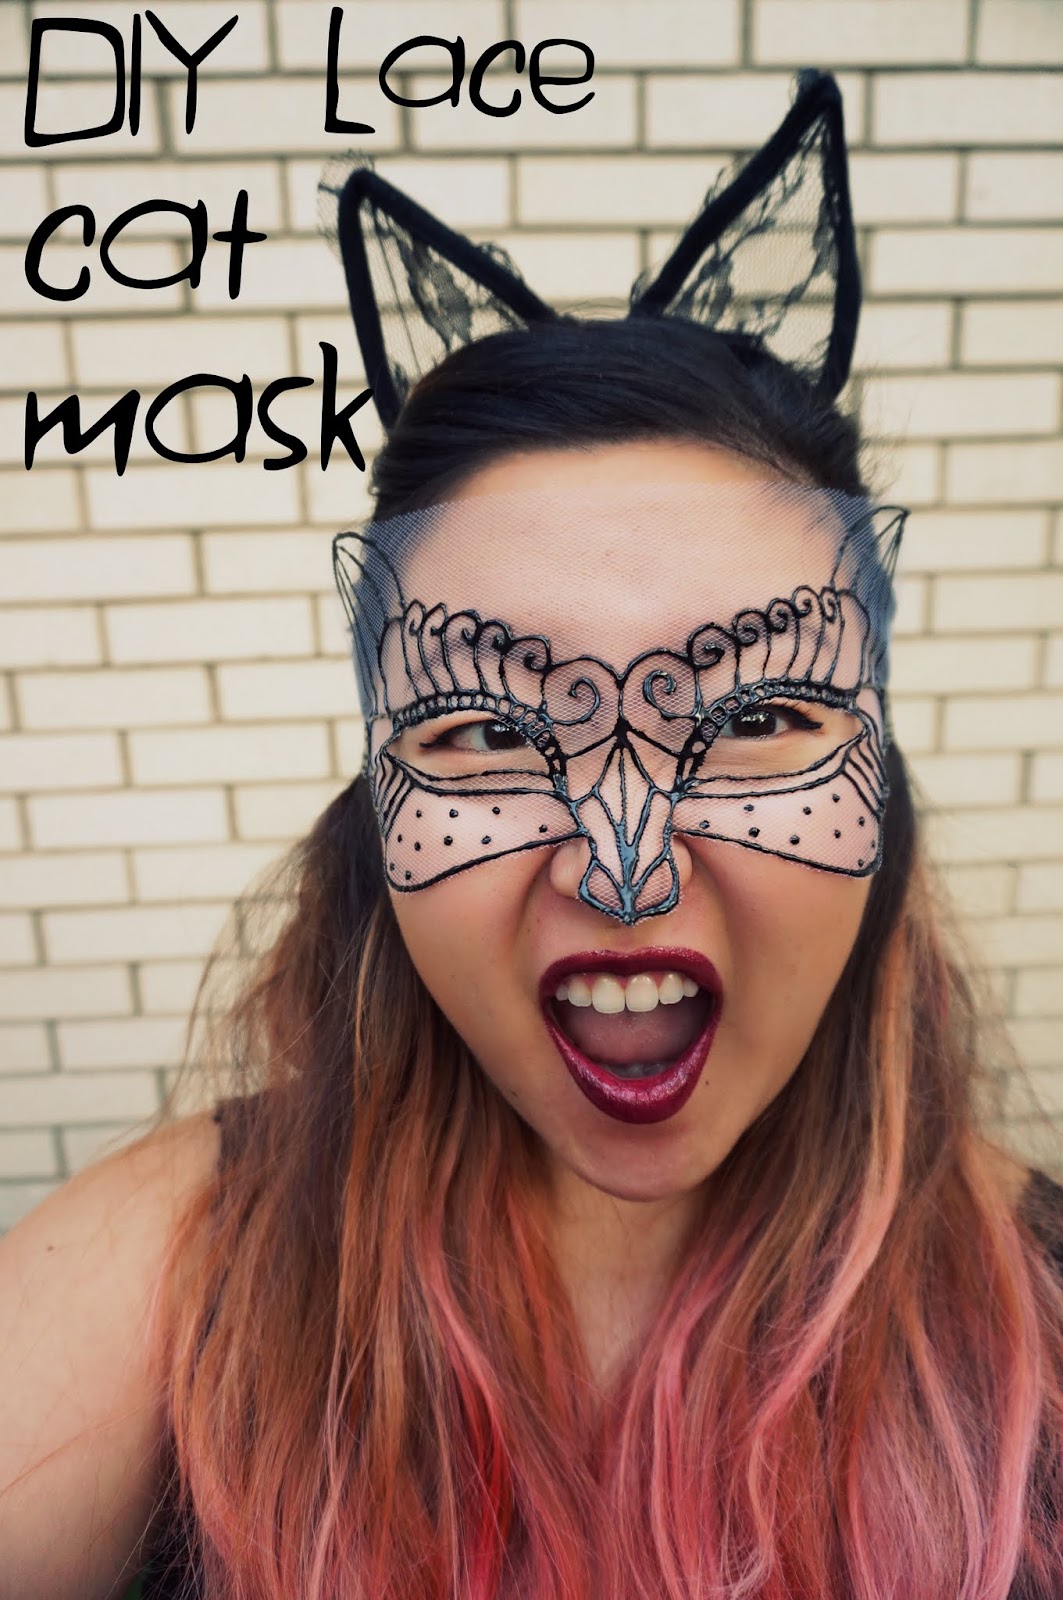
I made a little mistake with this particular mask; I cut away the tulle around the ears and then they were too heavy and flopped over and then I ended up just chopping the ears off. I think the key is to not cut out any of the tulle between the ears, which I did with my second attempt.

 The reason I made a second mask is because my sister said that my first mask looked like a fox. I still love that mask though. I'll be bringing both down with me to NOLA and make a last minute decision on which mask I should wear.
 Here's what the mask looks like on my face. I love it! I think it's sassy and fun and also means I don't have to slather my face with cat-style makeup. This aspect was pretty important to me because we have dinner plans in between Krewe of Boo and the Halloween Party so I don't want to be sitting in the restaurant ruining my makeup as I stuff my face. Nor do I want to scare the fellow diners.

 To enhance the costume, I got this cat onesie and tights. When I tried the outfit on, my sister said I looked like some crazy cat lady Voltron (because I'm a cat made by smaller cats) but I like that. So that's what I'll be; I'm a crazy cat lady Voltron.

 Happy Halloweening!
 xoxo.
xoxo.
I've been debating about my costume for weeks. I wanted to do something kind of cool but low-maintenance (since I have to travel with it) and since I expect it to be 70F in NOLA, I wanted to have a light costume that wouldn't leave me sweating. Well, I found a "catsuit" (emphasis on the quotations) and decided that, though it's been done before, being a cat would be fun and classic and super low maintenance.
But, to amp it up a bit more, I decided to DIY some more elements to accompany the outfit. Instead of the typical cat ears, I got inspired by my own bib necklace (I still have tulle leftover from that project and from my woodland nymph bustier project) and I made an easy cat mask using just some fabric paint and some ribbon. I've seen a similar DIY done before but I always like sharing my own version because I list my personal tips and tricks that may help you.
tracing paper
pencil
black marker
scissors
puffy paint (I used black but you can use whatever color you like; there are some pretty glittery ones that could be awesome)
strip of tulle, about 4" x 8"
parchment paper
ribbon
fabric glue


I made a little mistake with this particular mask; I cut away the tulle around the ears and then they were too heavy and flopped over and then I ended up just chopping the ears off. I think the key is to not cut out any of the tulle between the ears, which I did with my second attempt.


Comments
Post a Comment